How to Recover Lost Photos from Your iPhone Without Backups
How do I recover lost photos on my iPhone7 without backup? I had to restore it but when I restored it, the last backup was August. I've lost a lot of photos, apps, contacts, messages and bookmarks.
We all cherish our photos because they give new form to important people, events, places or things in our life where they will always stay as they were when their images were taken while they themselves inevitably change.This is why it's such a tragedy when one's photos are accidentally deleted and he or she didn't make backups of them.For example: Restoring your iPhone's factory settings can end up deleting all the media you saved on your iPhone. If you are like a majority of iPhone owners, it's likely you didn't make any additional copies—making it harder to restore your precious photos.
Part 1: What Toolkits Can Recover Your Lost Photos Even Without Backups
There are pieces of open-source software that can help, but these are very complicated to use as they are designed like a command line tool that needs specialized knowledge to be used effectively. The best course of action is to use a simple but trusted and powerful professional data recovery tool that lets you restore your deleted photos with or without any backups.One such tool is FoneDog iOS Data Recovery. An easy-to-use, all-inclusive data recovery program, iOS Data Recovery lets you recover and select deleted photos from your iPhone regardless whether you made backups of them to iCloud or iTunes and without restoring your mobile device.
There are several reasons why this tool is highly recommended for recovering photos that were accidentally deleted and weren’t backed up:
- Supports a wide range of content apart from photos, including messages, videos, reminders, notes, calendar events, call history and contacts. (This means that no matter the kind of photos you want to retrieve, whether Camera Roll, Photo Stream or Photo Library photos, you can get them back.)
- Provides you with three ways to restore your deleted photos:
- Directly from your iPhone even without any backups
- Using the backups you made to iTunes
- Using the backups you made to iCloud
- Lets you preview your deleted photos as thumbnails and retrieve the one(s) you want to get back instead of all of them and without doing a full iCloud or iTunes restore, making the data recovery process much easier.
- Features an easy-to-navigate user interface which ensures you can easily use the tool even if it’s your first time.
- Supports all of the iPhone models, from the iPhone 4, iPhone 4s, iPhone 5, iPhone 5s, iPhone 5c, iPhone 6/6s (Plus) and the iPhone 7 (Plus).
- Compatible with all of the iOS’ versions, from iOS 5 to iOS 10.
- Works well with both Windows and Mac computers.
- Guarantees that your data won’t be overwritten, ensuring a 100 percent safe data recovery. In fact, dr.fone has the highest recovery rate in the industry
Part 2: Step-by-Step Guide to Use FoneDog Toolkit to Recover Your Lost Photos Even Without Any Backups
Step #1: Download and Install the FoneDog toolkit. Connect your iPhone to your computer using its USB cable.
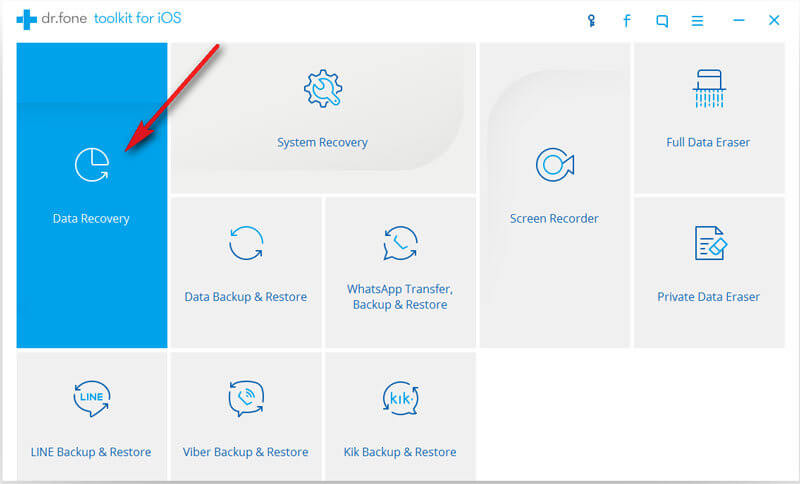
Step #2: Launch the toolkit on your PC, click ‘Data Recovery’ and select the ‘Recover from iOS Device’ option.
Tips:
Install the latest version of iTunes before running dr.fone. It might not work as effectively as it can otherwise.
To avoid automatically syncing your data, avoid launching iTunes and the dr.fone toolkit simultaneously. You can ensure this by disabling iTunes’ automatic syncing feature by launching iTunes > Preferences > Devices and then checking ‘Prevent iPods, iPhones, and iPads from syncing automatically’.
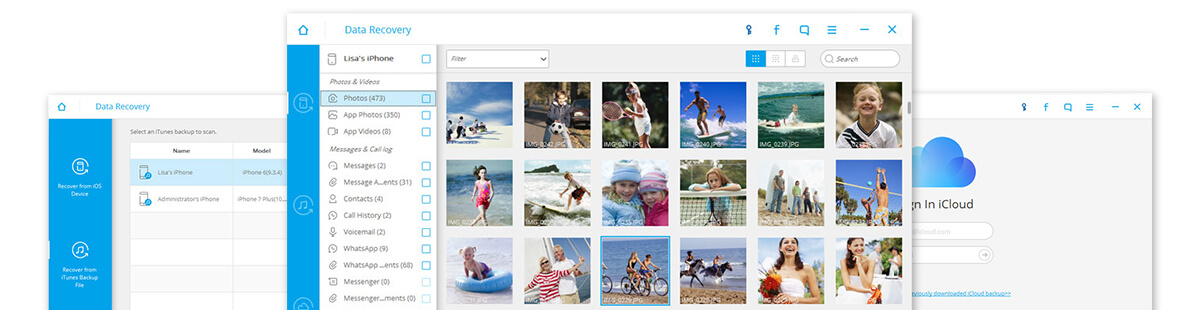
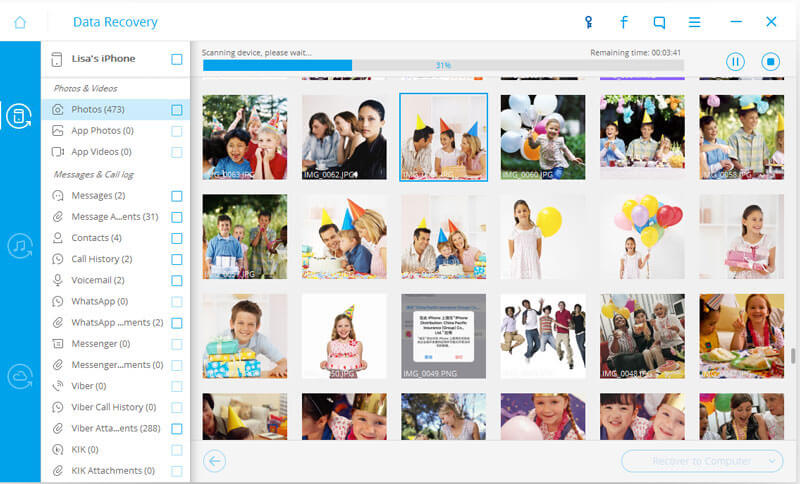
Step #3: Choose the type of data you want to recover, and Scan your iPhone for your lost photos by clicking ‘Start Scan’.This will take a few minutes, depending on the amount of saved data.
Step #4: Once you see your media come up, click ‘Pause’ to stop the scanning process.
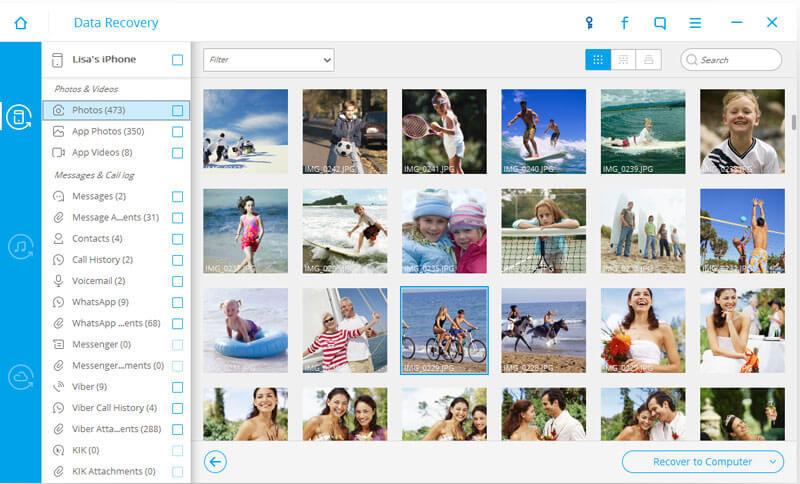
Step #5. Preview the data that will consist of both your existing and lost data and that will be displayed in categories.
Step #6: Select the deleted photos on your iPhone by swiping on the ‘Only display the deleted items’ option.
Step #7: Preview the files that come up by clicking the file type on the left side of the window.
A search box will appear on the top-right side where you can search for a specific file by typing a keyword in the search box.
Step #8. Retrieve your lost photos by putting a check mark in front of the box to select them and then click the ‘Recover’ button at the bottom-right side of the window. This saves them to your PC.
Part 3: How to Backup Your Photos on Your iPhone to iCloud and iTunes
While you’re now likely to be more careful with your photos, it’s better to save copies of them in iCloud or iTunes to avoid having to go through the same ordeal of restoring them if they accidentally get deleted again.
1. Step-by-step Guide to Backup Your Photos on Your iPhone to iCloud
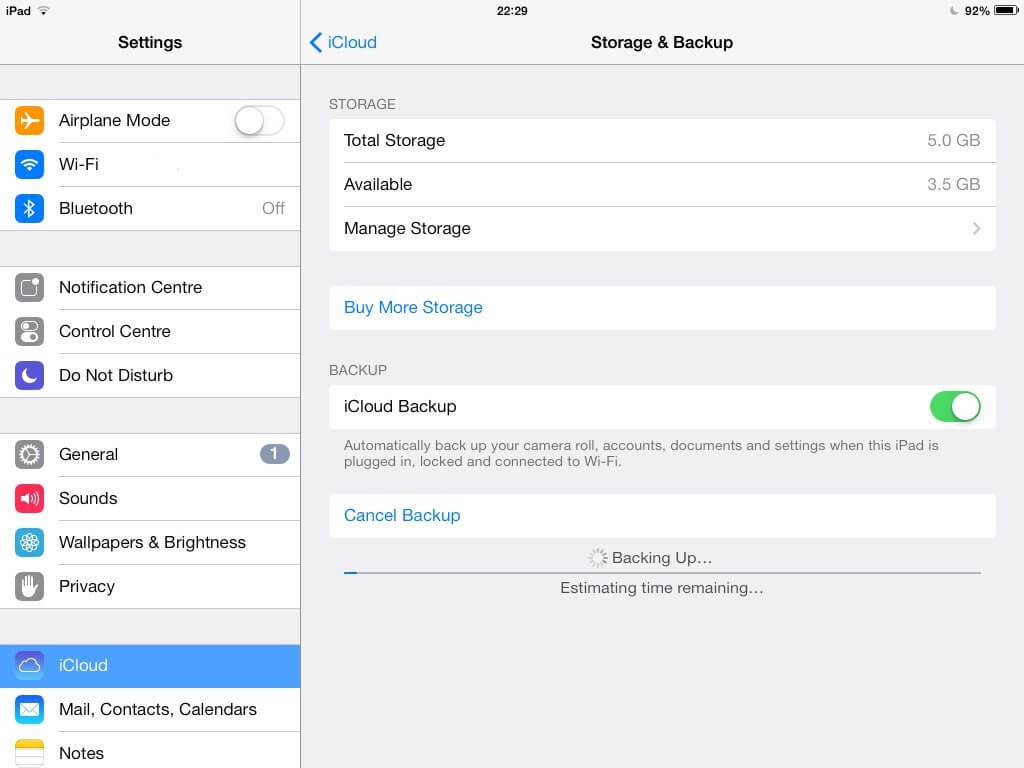
Step #1: On your iPhone, open ‘Settings’ and select ‘iCloud’.
Step #2: Click ‘Backup’ at the end of the menu.
Step #3: Go to ‘iCloud Backup Settings’ and enable ‘iCloud Backup’.
This immediately displays a message that iTunes won’t back up your data as long as the iCloud Backup option is enabled.
When you sync or connect to a network, iCloud backs up all the data saved on your iPhone.
For your photos to get virtually instantaneously backed up to iCloud, enable the ‘Backup Now’ option in iCloud’s backup main screen. This backs up your photos that weren’t stored before.
2. Step-by-step Guide to Backup Your Photos Using iTunes
Step #1: Launch iTunes, connect your iPhone to your computer.
Step #2: Select your device and right click on your iPhone on the device and choose the ‘Backup’ command.
Step #3: Then you will go to the summary tab and click the large Back Up Now button as shown in the middle of the window. Next, Click the Sync button at the bottom right of the window. The backing up progress window shows.
iTunes can backup all of your data automatically and regularly. Check whether you have accidentally disabled this feature on your iPhone. If you have, enable it to enjoy the convenience it provides.
If you choose iCloud over iTunes to back up your photos, know that you can store only up to 5GB of data to iCloud. But you can do so anytime on your account as long as you have access to a stable and reliable internet connection.
Video Guide on How to Recover Data from iPhone
Our photos are so valuable because they are tangible forms of our most precious memories, so do your best to keep them safe. But if you accidently lose them on your iPhone, make sure you use a simple but trusted and powerful tool like FoneDog toolkit as well as back up your media to iCloud or iTunes. Here, we provide a video guide for you.
A perfer recovery I have never seen before, it is worth trying.More here.
回复删除https://www.fonedog.com/ios-data-recovery/